







For the artisan soap maker, the cold process method—while deeply rewarding—requires a significant investment of time, patience, and meticulous safety protocols regarding lye handling. However, the melt-and-pour method offers an accessible, highly cathartic alternative that yields stunning, gallery-worthy results in a fraction of the time.

By mastering the technique of embedding colorful shapes, intricate patterns, and multi-dimensional elements into melt-and-pour soap bases, crafters can bypass days of curing and jump straight into the creative process. Yet, despite its beginner-friendly reputation, embedding shapes comes with a distinct learning curve. Variables such as soap base chemistry, precise pouring temperatures, and cooling intervals can mean the difference between a pristine design and a melted, structurally compromised bar.

The Foundation: Selecting the Right Melt-and-Pour Soap Base
Melt-and-pour soap base is a pre-saponified medium designed to be segmented, thermally liquefied in a microwave or double boiler, customized with additives, colors, and fragrances, and poured into custom molds to harden. While the market offers diverse formulations—including goat milk, oatmeal, and honey bases—understanding the properties of two primary categories is essential for successful embedding.

1. White Soap Bases (Oatmeal, Shea Butter, and Goat Milk)
White soap bases are characteristically opaque and texturally softer. Because they typically incorporate skin-nourishing emollients like shea butter, honey, or colloidal oatmeal, they feature a lower melting point compared to high-glycerin formulas. Due to their opacity and softness, white bases are predominantly utilized for exterior layers rather than fine, internal embedded shapes.

2. Clear Soap Bases (Glycerin)
Clear soap bases boast a high concentration of glycerin, a potent humectant derived from plant or animal fats. These bases are structurally firmer than white bases, meaning they absorb more heat, cool down at a slower rate, and retain intricate geometries more effectively. Furthermore, colorants—particularly mica powders—appear significantly more vibrant when suspended in a clear base, making glycerin the gold standard for internal embeds. Once crafters master foundational techniques, however, these rigid rules can be bent to suit avant-garde designs.

Hardware and Molds: Equipping Your Studio
Choosing the correct mold architecture dictates both the physical structure of the soap and the visual presentation of the final product.

Molds for Creating Embeds
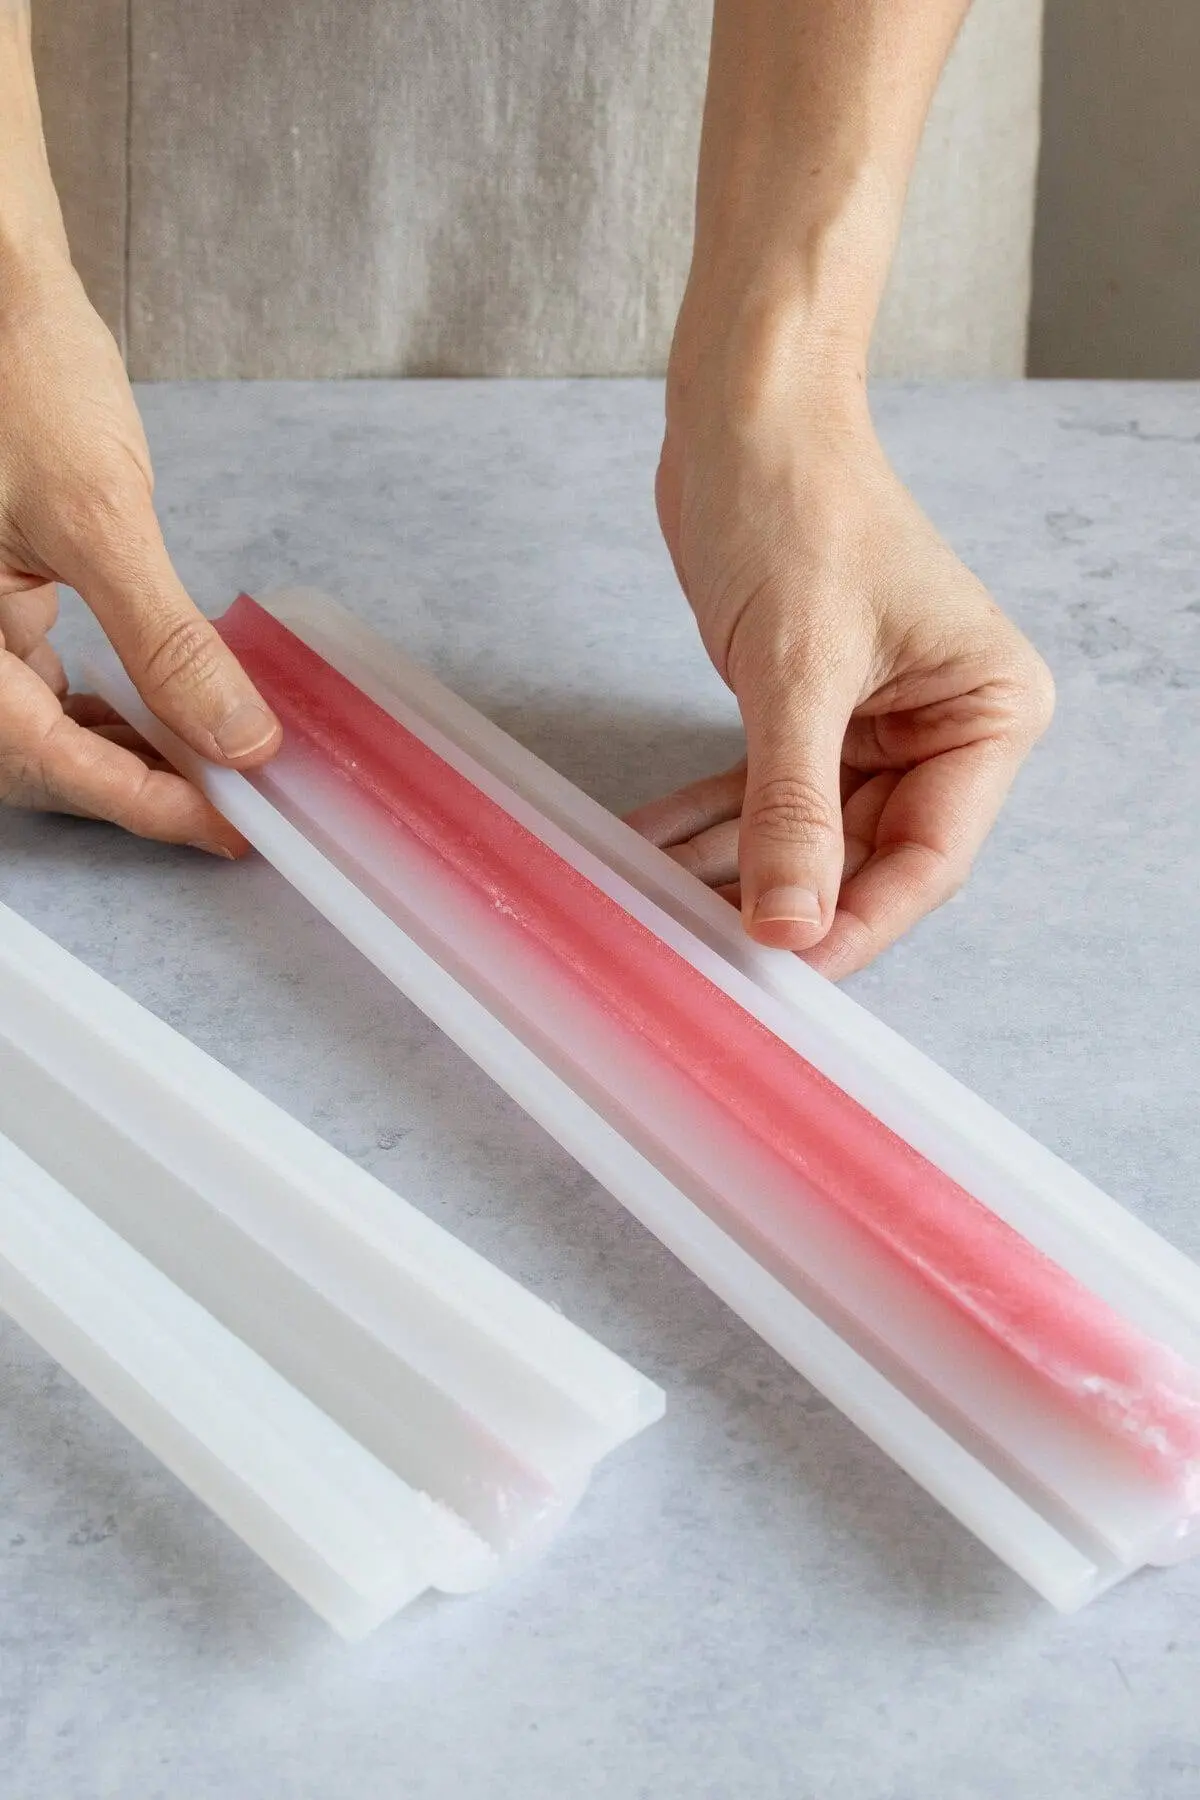
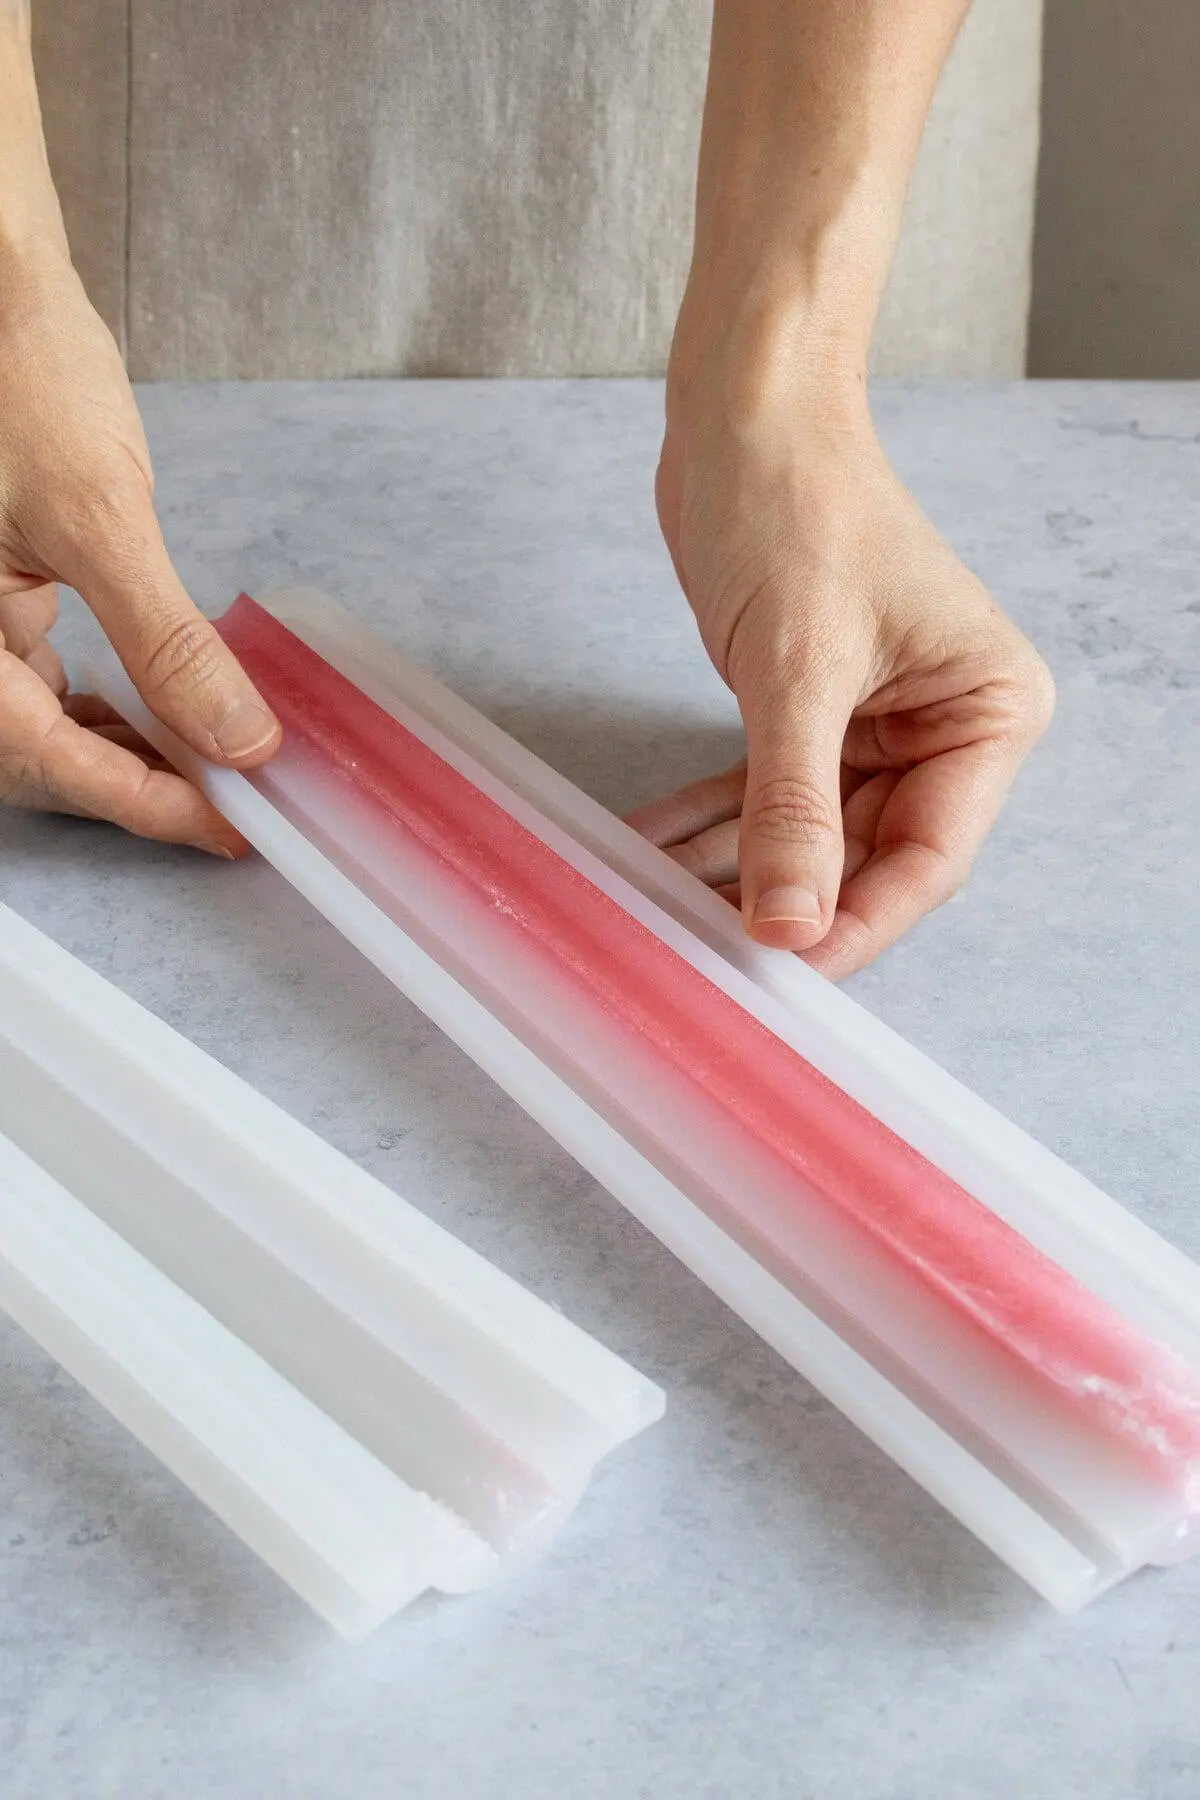
- Column Molds: The industry standard for repeating interior patterns. These flexible silicone tubes feature interlocking seals that snap together to form a cylindrical channel. Liquid soap is poured down the center, allowed to cure, and peeled away to produce a continuous column that can later be sliced and placed into larger loaf molds.
- Silicone Cake-Decorating Molds: Ideal for crafting flat, detailed, or whimsical shapes (such as butterflies or stars) intended for surface placement or mid-bar layering in individual cavities.
- Non-Soap Commercial Embeds: Crafters are not strictly limited to soap-based embeds; alternative elements can be integrated provided they do not compromise skin safety or structural integrity.
Molds for Final Pouring
- Rectangular Loaf Molds: Large block molds that accommodate multi-bar pours. Once set, the massive soap block is un-molded and hand-cut into individual bars, revealing cross-sectional geometric designs.
- Single-Bar Cavity Molds: Individual compartments that yield finished bars instantly, eliminating the need for post-cooling slicing. These are typically paired with flat or three-dimensional embeds.
Chronology of the Craft: Three Essential Embedding Techniques
Achieving mastery over melt-and-pour design requires understanding three core construction methodologies.

1. The Column Method (Repeating Interior Patterns)
- Preparation: Fabricate long, cylindrical shapes using a silicone column mold with your chosen colored soap base.
- Assembly: Once fully cured, position the column horizontally inside the bottom of a rectangular loaf mold.
- The Pour: Carefully pour liquid melt-and-pour base around and over the column.
- Finishing: Allow the entire loaf to set completely before slicing it into individual bars. Each slice will display the embedded design running perfectly through its center.
2. The Layered Single-Bar Method (Suspended Floating Effects)
- Base Layer: Melt a clear soap base and fill a single-bar cavity mold halfway.
- Surface Conditioning: Spritz the surface with rubbing alcohol to eliminate surface tension and bubbles, then allow it to form a semi-firm skin for approximately 15 to 20 minutes.
- Placement: Arrange 2 to 3 flat embeds (such as delicate butterfly shapes) onto the hardened foundation layer.
- Encapsulation: Ensure your secondary clear soap base is precisely tempered between 130°F and 140°F to avoid melting the embeds. Pour the second layer over the shapes, spritz again with alcohol, and let cure.
3. The 3D Sculptural Method (Protruding Elements)
- Sculpting the Feature: Cast a three-dimensional shape (such as a rose) using a detailed silicone mold with a colored white soap base. Allow it to set for one hour, then gently slice the shape in half if a flush base is required.
- Anchor Pour: Prepare a fresh batch of colored soap base and fill a single-bar cavity mold roughly three-quarters full. Spritz with alcohol and let it set for 10 to 15 minutes.
- Final Integration: Verify that the soap temperature is safely at or below 140°F. Pour a very thin secondary layer of soap onto the cooled base, and swiftly anchor your 3D shape into position, ensuring part of the design extends beyond the terminal surface for a striking, tactile finish.
Supporting Data: Critical Parameters for Success
Temperature control is the single most critical factor in successful melt-and-pour crafting. Deviating from optimal thermal windows frequently results in compromised structural integrity.

| Parameter | Recommended Range | Consequence of Deviation |
|---|---|---|
| Pouring Temperature | 130°F – 140°F | Below 125°F: Premature gelling / incomplete mold filling. Above 145°F: Melting of pre-cast embeds / mold warping. |
| Microwave Heating | Short bursts (30-sec intervals) | Prolonged heating: Scorching, moisture loss, and rapid surface skinning. |
| Inter-Layer Curing | 15 – 20 minutes | Below 10 mins: Sinking/floating embeds. Above 30 mins: Layer separation and structural cracking. |
| Total Loaf Curing | Minimum 4 hours | Premature un-molding leads to tearing and deformation. |
Official Industry Best Practices and Professional Tips
Veteran soap makers emphasize several fundamental rules to elevate the quality of finished batches:

- Thermal Vigilance: Always utilize a digital kitchen thermometer. While online forums frequently recommend pouring at 125°F, professional experience dictates that 140°F provides the optimal viscosity without dissolving underlying embeds.
- Preventing Thermal Shock: If working with delicate, thin soap embeds that threaten to warp under warm liquid, chill them in a refrigerator for 5 to 10 minutes before submerging them in the secondary pour.
- The Power of Alcohol: Keep a continuous spray bottle of 91% or higher rubbing alcohol nearby. Misting layers before and after pouring acts as a bonding agent and instantly eliminates surface micro-bubbles.
- Rehydration Protocol: If a batch of soap base must be repeatedly microwaved and begins thickening prematurely, restore its moisture equilibrium by stirring in precisely ½ teaspoon of distilled water per pound of soap base.
Troubleshooting Common Production Failures
Even seasoned crafters occasionally encounter structural defects. Resolving these issues requires diagnostic precision:

- Sinking or Melting Embeds: Caused by pouring soap that is either too hot or too structurally thin. Ensure the foundation layer has developed a sturdy, tactile skin before introducing new elements, and rigorously monitor your thermometer to maintain the 130°F–140°F window.
- Cloudiness and Air Bubbles: Trapped air or excessive heat causes opacity in clear glycerin bases. Always heat bases slowly at reduced power levels, stir gently to prevent aeration, and rely on generous spritzes of rubbing alcohol.
- Layer Delamination and Cracking: This structural failure occurs when a base layer is allowed to cool too completely before the subsequent pour, preventing the molecules from bonding. Pour subsequent layers while the foundational layer remains slightly warm to the touch.
Implications for the Handcrafted Bath and Body Market
The growing popularity of advanced melt-and-pour techniques carries significant implications for boutique entrepreneurs and independent makers. By eliminating the curing overhead associated with cold process manufacturing—which can take anywhere from four to six weeks—artisans can drastically accelerate inventory turnover, respond rapidly to seasonal trends, and maintain precise artistic control over complex geometric designs.

As consumer demand shifts toward hyper-personalized, visually captivating aesthetic goods, the mastery of melt-and-pour embedding bridges the gap between commercial manufacturing efficiency and bespoke artisanal craftsmanship.